Motionprint Ergo lets you tailor the look and feel of your application and exported reports so they carry your organisation's identity when shared with clients or management. This article walks through every customization option available under Settings → General — from logo and color settings to the interface theme.
1Branding
All branding settings are found under Settings → General, in the Branding section. This section contains your company logo, minimized logo, brand color, company name, and active menu color. Changes are saved per installation and apply once you click the Save and apply button.
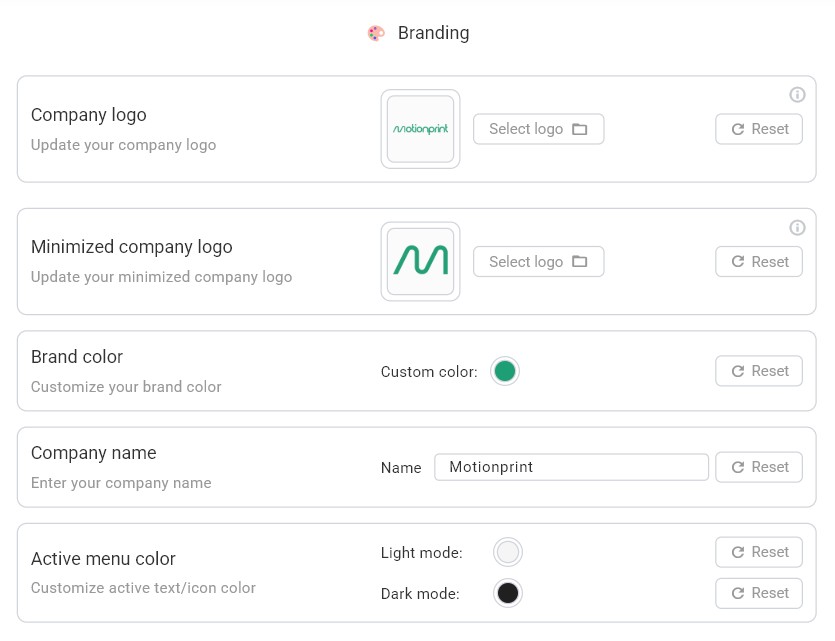
Company Logo
Upload your organisation's logo and it will appear in the top-left corner of the application sidebar. When the Use Company Branding setting is enabled for a specific report, the logo will also appear on the cover page of exported reports (PDF and Excel). Click the logo preview area or the Select Logo button to select your file.
- Supported formats: SVG, PNG, JPG, JPEG
- Ideal dimensions: 180 × 20 pixels (for horizontal logos) — different aspect ratios are supported
- Background: Transparent background recommended (PNG or SVG preferred)
A live preview shows exactly how the logo will appear. To replace the current logo, click the preview area or the Select Logo button again. To reset to the default Motionprint logo, click the reset button next to the preview.
Click the info icon (ℹ) in the top-right corner of the Company Logo section for a quick reference of supported formats and dimensions.
Minimized Company Logo
The minimized logo is a compact version of your company logo that appears when the application sidebar is collapsed. This allows your branding to remain visible even in the minimized navigation view.
- Supported formats: SVG, PNG, JPG, JPEG
- Ideal dimensions: 64 × 64 pixels (square format recommended)
- Background: Transparent background recommended
Upload a square icon or abbreviated version of your logo here. If no minimized logo is set, the default Motionprint icon will be used when the sidebar is collapsed.
Company Name
Enter your organisation's name in the Company Name field. When the Use Company Branding setting is enabled for a specific report, this name is used in:
- The PDF footer (displayed alongside the page number on every page)
- The cover page of exported reports (PDF and Excel)
The default name shown in exports is "Motionprint", which is restored by clicking the reset button or when Use Company Branding is not enabled for a report.
Brand Color
Click the color swatch next to Brand Color to open the color picker. You can enter a hex value directly or use the HSV sliders to choose visually. An opacity slider lets you fine-tune transparency.
The brand color is applied across:
- The application UI — buttons, active navigation highlighting, text selection, icon tints, and progress indicators
- PDF exports — section header backgrounds, cover page title color, chart accents, page decorations, and dividers
- Excel exports — header cell backgrounds, title cells, and section header colors
- 3D avatar — used as the highlight color on the avatar
The default brand color is Motionprint Orange (#EA523B). Click the reset button to restore it at any time.
Risk-level colors (green, amber, red) are standardised by the methodologies and cannot be changed. Your brand color applies only to neutral and informational elements.
Active Menu Color
The active menu color controls the highlight color used for the currently selected menu item in the sidebar navigation. Because the brand color is used for button styling, a separate active menu color ensures that selected menu items remain clearly readable regardless of the chosen brand color.
This setting has separate values for Light mode and Dark mode, each with its own color picker, hex input, and opacity slider. This lets you ensure the active menu text and background contrast correctly against both themes.
- Light mode default:
#F5F5F5(light gray) - Dark mode default:
#202020(dark gray)
The active menu color only affects the application interface — it does not apply to exported reports.
2Interface Theme
The interface theme setting is found under Settings → General, in the Interface section directly below the Branding section.
Choose between two application themes:
- Light — Light background, dark text. The default theme.
- Dark — Dark background, light text. Easier on the eyes in low-light environments.
The selected theme affects the entire application interface — backgrounds, text colors, borders, and menu styling. The Active Menu Color setting (under Branding) has separate values for each theme to ensure proper contrast in both modes.
The interface theme does not affect exported reports. PDF and Excel exports use their own styling based on the brand color and report-specific settings.

3Using Company Branding in Reports
The branding settings defined above (company logo, company name, brand color) can be applied to exported reports on a per-report basis. Each report type (e.g. NIOSH) has a Use Company Branding toggle in its own report settings.
When Use Company Branding is enabled for a report:
- The company logo appears on the cover page (replacing the default Motionprint logo)
- The company name appears in the PDF footer on every page
- The brand color is used for section headers, chart accents, and other styling elements in both PDF and Excel exports
When disabled, exports use the default Motionprint logo, name, and color scheme.