Motionprint Ergo can record motion data directly from Xsens Awinda hardware, without leaving the app. This guide walks through the live recording workflow end to end — from connecting a dock to reviewing what happens once you stop recording.
1 Overview
Motionprint Ergo talks to Xsens Awinda hardware directly through the MVN SDK, so you can capture, review and score a task without a separate export/import step through Xsens MVN Analyze.
A recording made this way is ready to use as report input the moment it's captured — it's saved straight into the Recordings Database, where you can play it back, trim it, and select it when creating a RULA, NIOSH or KIM-LHC report.
Motionprint Ergo accepts motion data either way: recorded live as described in this guide, or imported as an .mvnx file exported from Xsens MVN Analyze. Use whichever fits your workflow — see .mpcap vs .mvnx Explained for how the two compare.
2 Before you start recording
Live recording needs an Xsens Awinda dock and the sensor set you intend to use, connected to the machine running Motionprint Ergo. Two things need to happen before Motionprint Ergo can capture usable data:
- Hardware setup — the dock and sensors are scanned, and each sensor is assigned to a body segment. Covered in full in Hardware Setup & Sensor Troubleshooting.
- Calibration — the subject performs a guided N-pose or T-pose and a short walk so the system can establish body dimensions and sensor orientation. Covered in Calibrating Your Sensors.
Both steps are part of the same guided flow you'll walk through before every recording session, so you don't need to jump between separate screens to get set up.
3 Starting a session
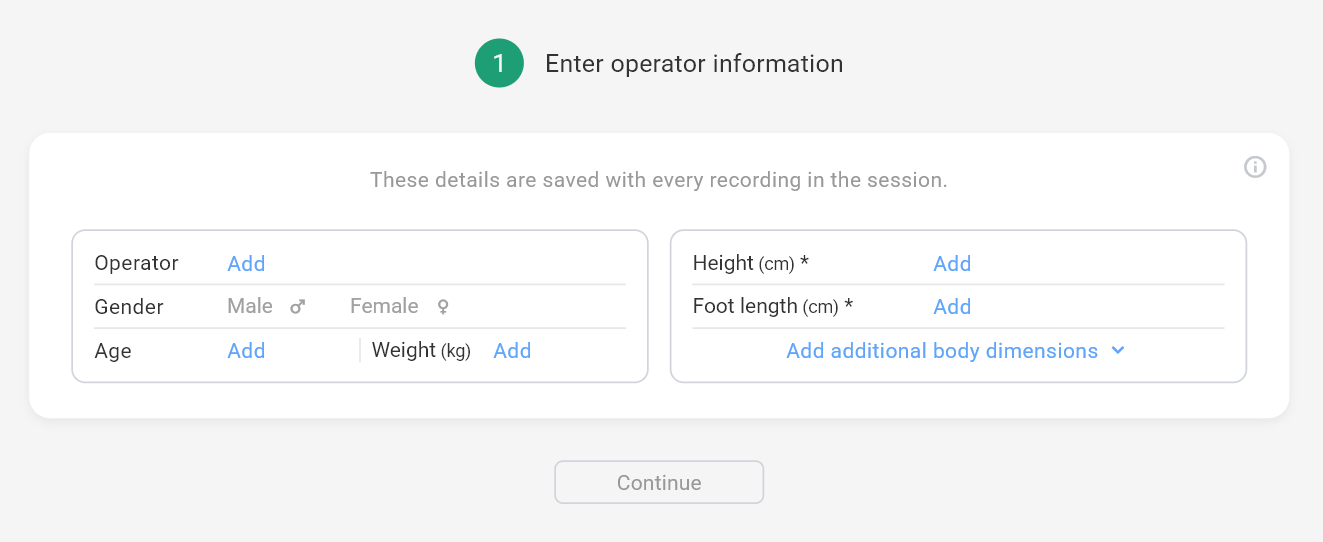
A session is the container for one subject's recordings. It carries the subject's details — the same metadata fields used elsewhere in Motionprint Ergo, subject to your privacy settings — and can hold more than one recording. This means that if you're recording several tasks for the same person, you enter their details once at the start of the session rather than re-entering them for every task.
The only required fields are the subject's height and foot length, which the calibration needs. Operator, gender, age and weight are optional, and each of them can be turned off in privacy settings if you don't collect it. Additional body dimensions can be added for a more precise calibration.
To start, open Record from the main navigation and create a new session, or continue an existing one from earlier the same day. Once hardware setup and calibration are complete, the session is ready to record.
4 Recording a task
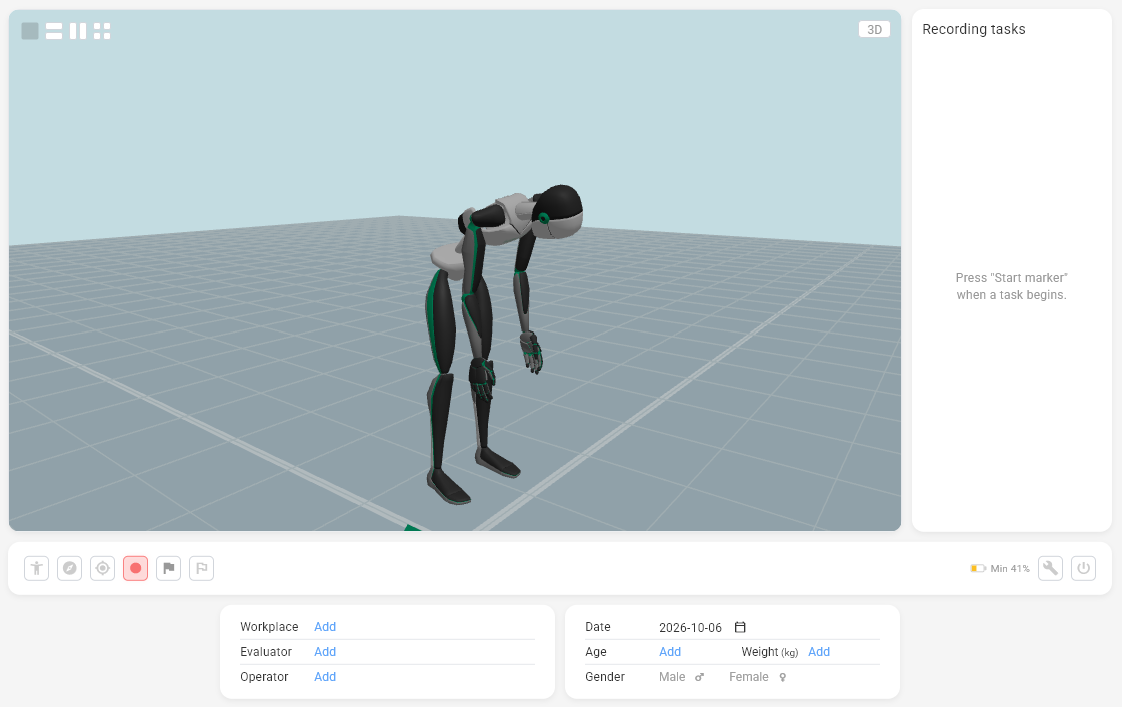
With calibration done, start a recording for the task you want to assess. A live 3D view of the tracked skeleton is shown while recording, so you can confirm the sensors are tracking correctly before the subject begins the task.
- Start the recording when the subject is ready to begin the task
- Let them perform the task as they normally would
- Stop the recording once the task is complete
You can record multiple takes of the same task, or multiple different tasks, within a single session — each becomes its own recording.
Marking tasks within a recording
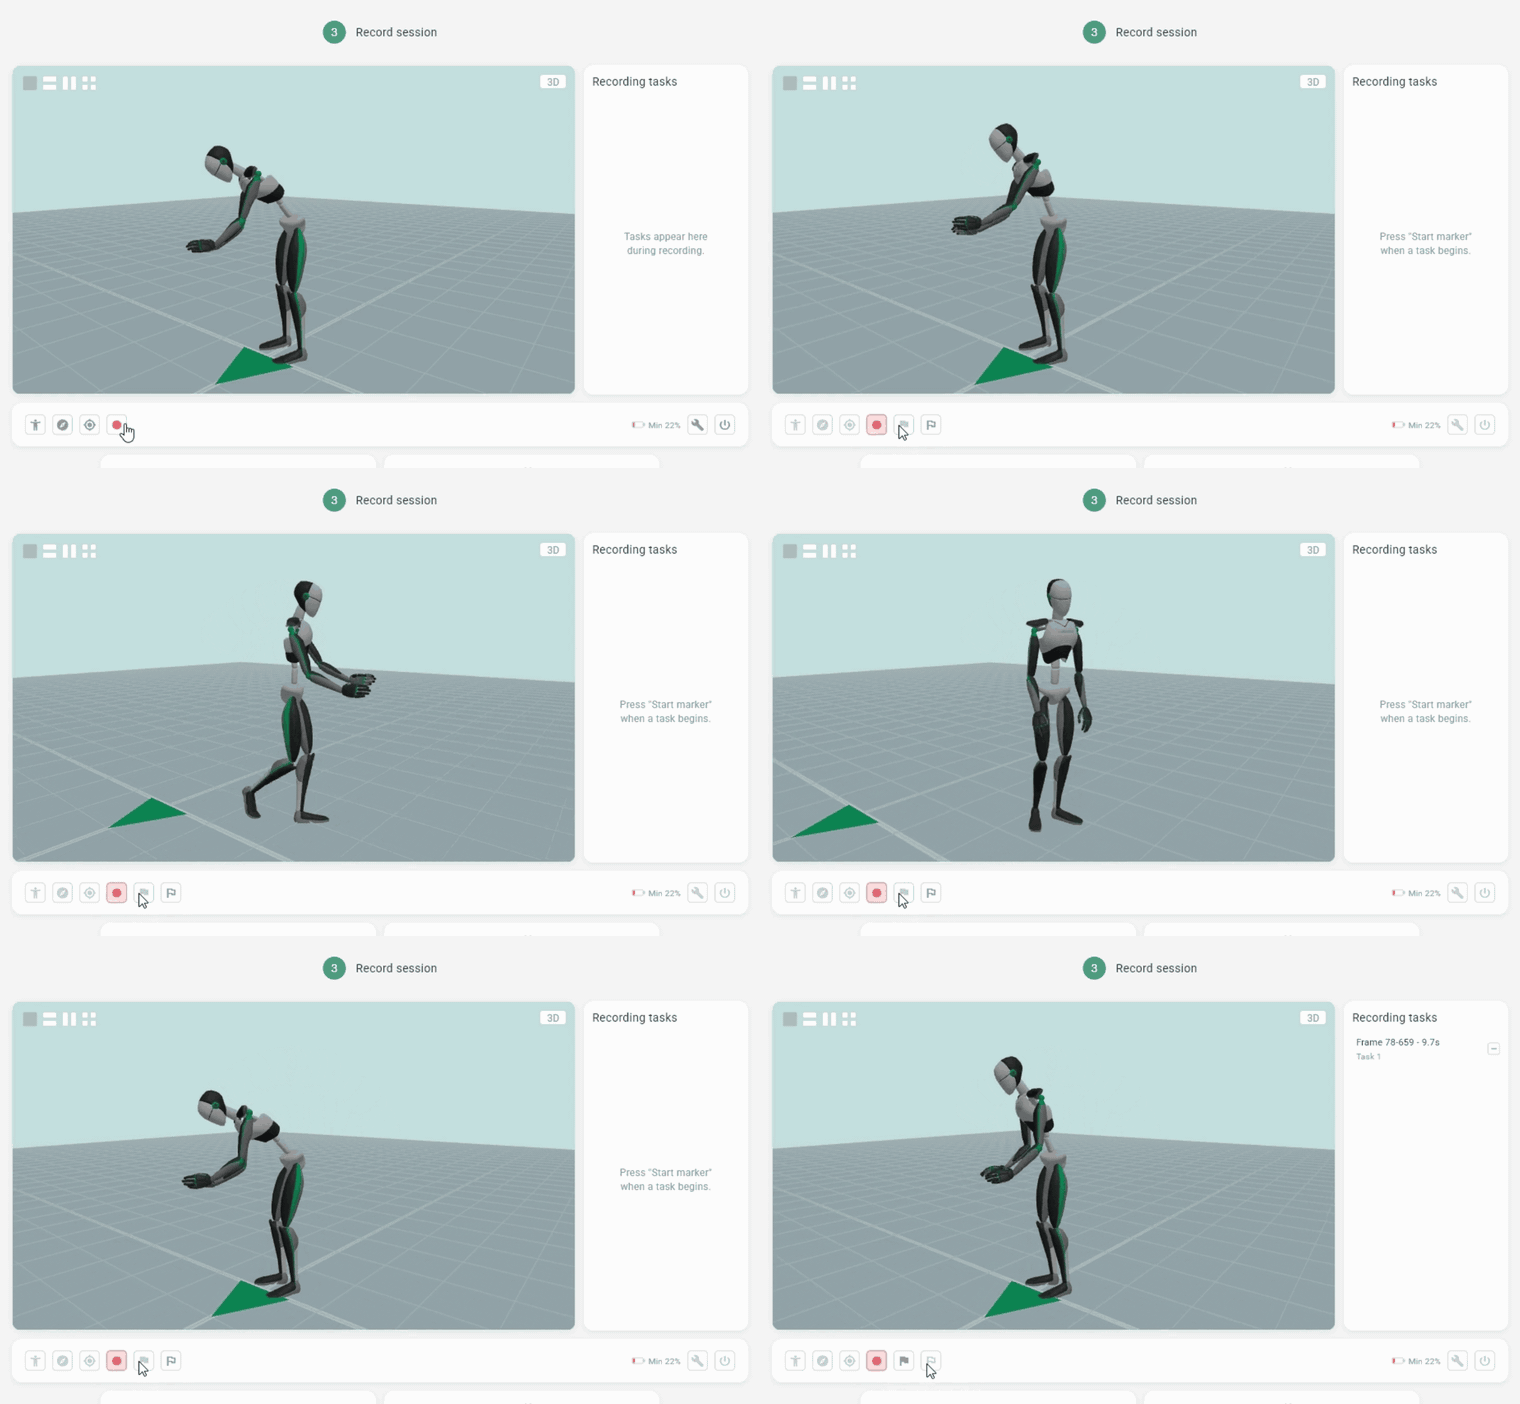
If one recording covers more than one distinct task — several lifting tasks performed back to back, for example — use markers to divide it instead of stopping and starting a new recording for each. Click Start marker when a task begins and Stop marker when it ends; each marker becomes its own task, and you can add as many as the recording needs.
These markers aren't just bookmarks: when you later create a report from this recording, they carry straight over as pre-filled tasks — lifting moments for NIOSH and KIM-LHC, posture tasks for RULA — in the same place you'd otherwise add them by hand. Task-specific details a marker can't capture, such as NIOSH load weight or coupling, are left for you to fill in on the report's input page.
Keyboard shortcuts
The recording viewport responds to three keys, also shown on their matching buttons:
- R — start or stop the recording
- S — start a marker
- E — stop (end) the current marker
Shortcuts are ignored while a text field (such as a metadata field) has focus, so typing "s" there won't start a marker.
Resetting origin and heading axis
If the tracked avatar's position or heading drifts between takes, two controls in the viewport recentre it without redoing calibration: Reset avatar origin to right heel and Reset avatar heading axis. Both require calibration to be complete and no recording to be in progress — stop the current recording first if one is running, apply the reset, then start recording again.
5 What happens after you stop
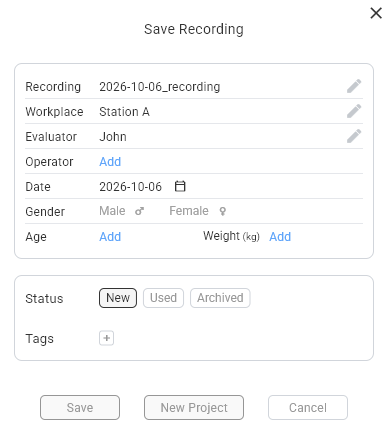
Stopping a recording opens the Save Recording window. Here you give the recording its title, check or complete its metadata — workplace, evaluator, operator, date, gender, age and weight — and set its status (New, Used or Archived) and tags. Then you choose how to proceed:
- Save — the recording is added to the Recordings Database and you stay in the session, ready to record the next task.
- New Project — the recording is saved, you pick a RULA, NIOSH or KIM-LHC report, and you're taken straight to that report's input page, pre-filled with the recording's metadata, trim range and tasks.
- Cancel — discards the capture instead of saving it, so it's safe to back out of a take you don't want to keep.
Once saved, the recording lives in the Recordings Database, where you can:
- Open it in the recording viewer to review playback and trim it to the relevant section
- Select it as the input when creating a report, if you didn't choose New Project above
- Set its status to Used or Archived once you're done with it — the status is yours to manage and doesn't change on its own
Whenever you're ready to move on, click New Project in the sidebar to leave the session and start a fresh report elsewhere — the session and everything recorded in it stay exactly as saved, so you can come back to it later the same day.
Once you've recorded a task, head to the recording viewer to review it, or select it directly as input when creating your next report.